


Here
is my step by step process.
(The Rit Dye website has directions to follow too, check
them out here.)
You will need:

1. First, I washed the chair
covers on the cold cycle. (My washing machine fit 4 at a time.)
2. I decided to dye the covers in
a plastic bin outside. I set this up while the chair covers were in the washing
machine. I used a bottle of the Royal Blue Rit Dye. Then, I filled the bin with 4
buckets of hot water from my kitchen sink.

3. The website says that you may
want to add salt, so I did. To do this I put 2 cups of warm water in a bowl.
Then dumped in 1 cup of salt. I stirred this until the salt had dissolved.
4. Next, I added my bowl of salt
water to the plastic bin of water and dye. I was sure to stir this all together
really well.
5. When my dye station was all set
up, my washing machine had completed the cycle. I took out the chair
covers and put each one into the bin of dye (one at a time). I mixed the cover
around for about 1-2 minutes. (The website directions say to keep the item in
the dye for 10-30 minutes, but I was worried they would shrink, so I opted for just
a couple of minutes instead.) When the chair cover was in the water, I continually stirred
and moved it around to help evenly distribute the dye. (I used the end of a broom to
stir.)
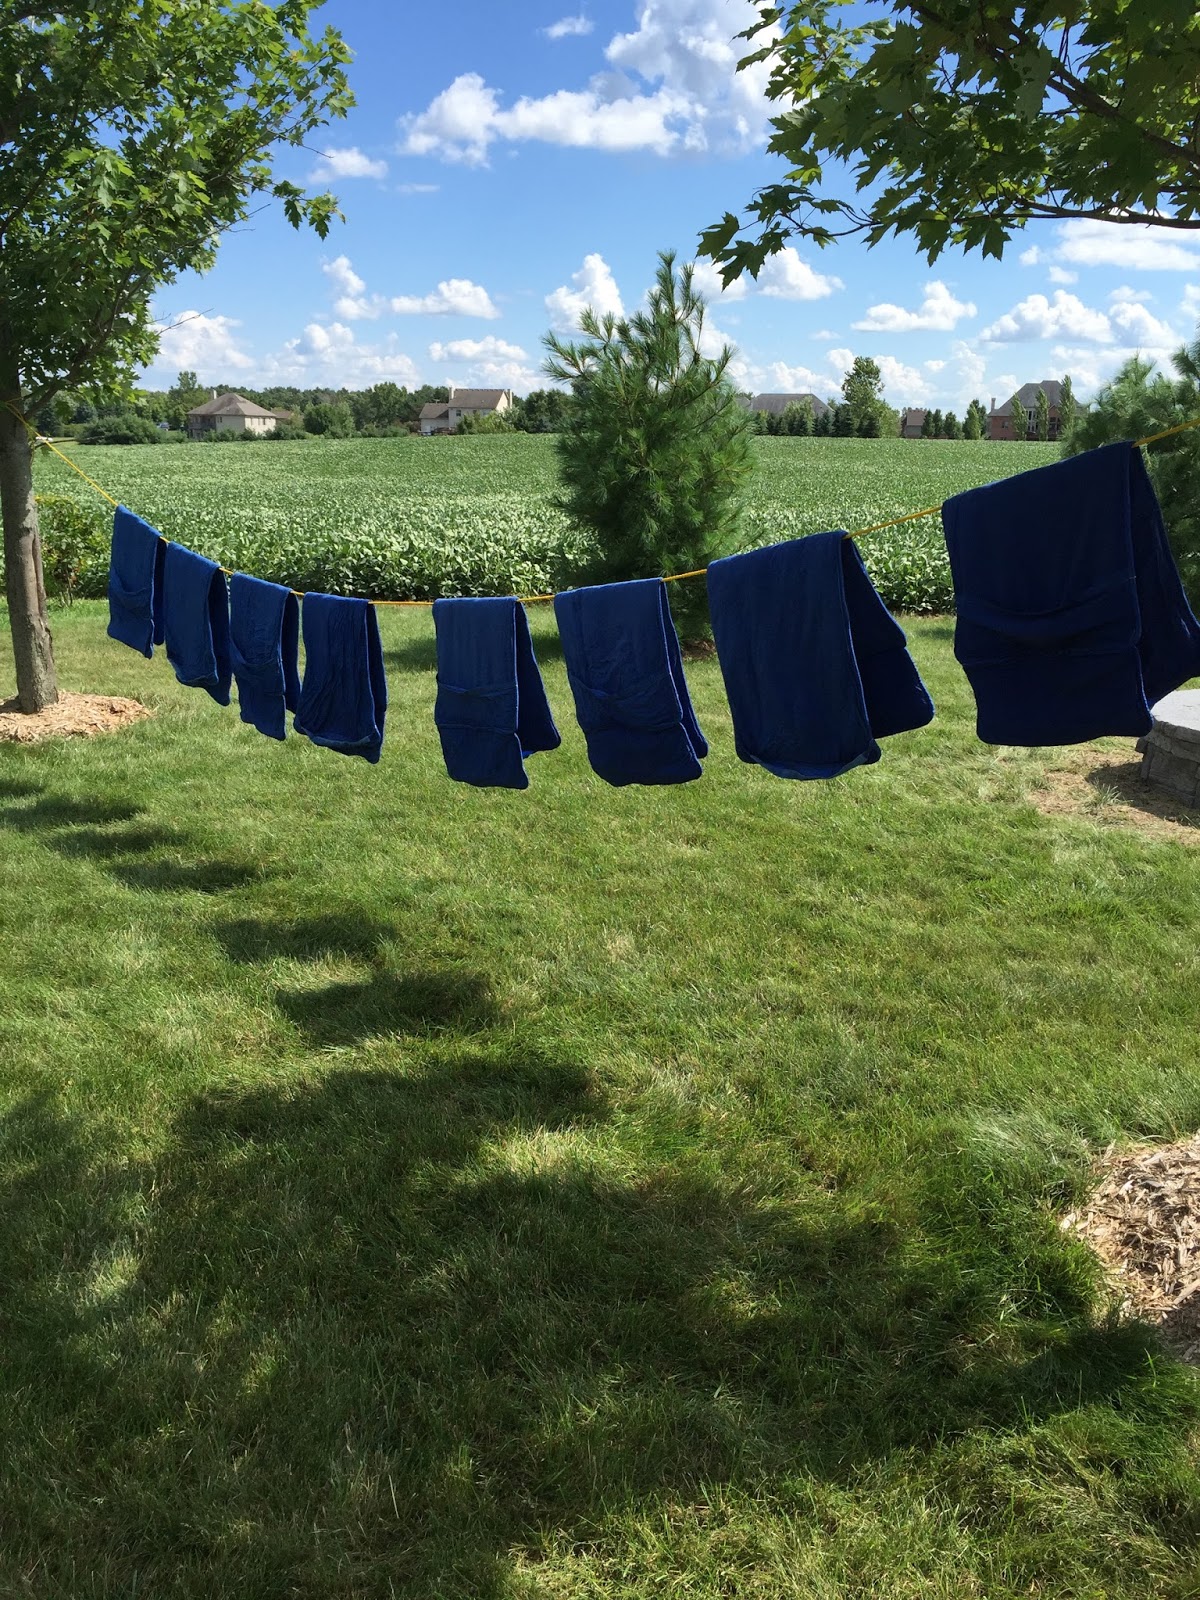
6. After a couple minutes, I squeezed
out the water/dye mixture and hung the chair cover on my clothesline. Then, I moved
on to the next cover.
7. I let the covers air dry on the
clothesline for an hour or so.

8. After this, I brought the covers
into my laundry room sink and rinsed them with water. I started with hot water then changed to warm and cold. I rang out as much water as I could.
All of the chair covers then went back into the washing machine.
9. This time, I selected the
Warm/Cold Washing Cycle. (Again I did not want to use the Hot Cycle for
shrinking purposes)
10. When the washing machine was
done, I air dried the covers on my clothesline.
11. Finally, when they were dry, I
was done! (Well at least the first 4 were done…I still had 8 more chair covers to go..)
Final
Thoughts: I will tell you that the covers do still shrink a little bit, mostly
in the length. I was still able to get the cover onto the chair and I’m hoping
the length will stretch back out as the children sit in the chairs. Overall, I
am very happy with the end result! The chair covers look so new and clean! I
can’t wait for my students to see these bright blue chairs!
Happy
dyeing!
